
I just rebuilt my personal website for the third time in 25 years.
In this new version, I scrapped everything from v2.0, which ran WordPress with a custom theme. This full replacement, built from scratch, took about two months of work between priority projects. This is the first post in this major revision and I’m loving it!
The purpose of this post is to document the work and decisions made along the way. While it’s mostly for future me, I’ve added some background for the curious reader.
Contents
- Initial Goals
- The Early Web Log
- Enter WordPress
- The Cracks Begin
- Exit WordPress
- Time to Start Over
- Cleaning Up Content: Part I
- Editing Interface
- Text Transformations
- Enhanced Searching and Navigation
- Popovers and Dialogs
- The Finer Details
- Cleaning Up Content: Part II
- Optimized Images
- Tooling
- Basic Statistics
- Work In Progress
Initial Goals
- Replace WordPress with a lightweight solution
- Basic, minimal design with simple navigation
- Use only built-in fonts
- No frameworks
- Minimize client-server interactions to improve performance
- Isolate admin mode code from visitor code
- Respect privacy: no third-party analytics or tracking
- Store all data in a fast, local SQLite database
- Incorporate user engagement features (replies, likes, sharing, etc.)
- Allow visitors to add, edit, and delete replies without needing an account
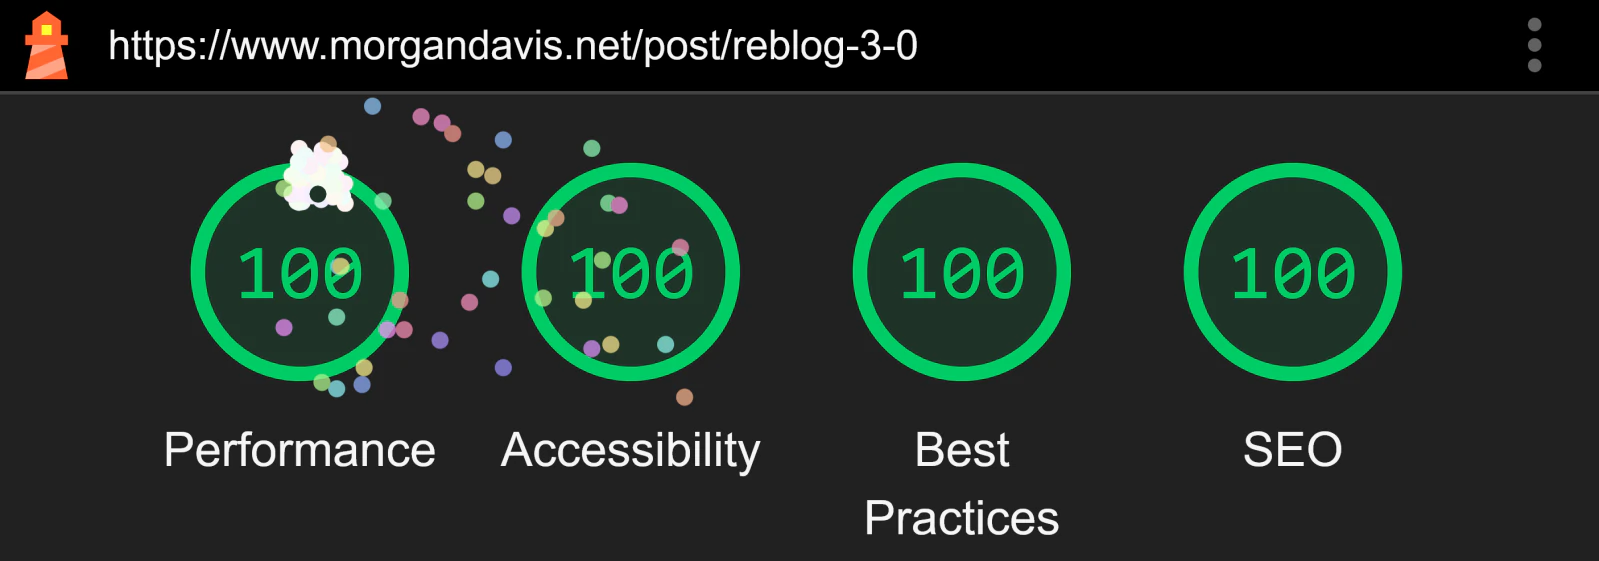
- Achieve solid Lighthouse scores
The Early Web Log
In 2003, I built a series of pages on this domain—a prehistoric blog predating WordPress—chronicling my two decades in tech. As my career evolved, the site became a digital résumé, possibly a gateway to new ventures after leaving my last role: building and operating an ISP and data center.
Managing hundreds of employees and tens of thousands of customers, culminating in an acquisition by a public company, burned me out. I just wanted to get back to what I enjoyed: writing code, building websites, and running servers for hosting and email services. My hastily assembled HTML blog recorded that shift and, in turn, brought in clients.
Around this time, web logs became so popular we started calling them “blogs.”
Enter WordPress
Clients wanted websites they could manage themselves. WordPress, the PHP-based blogging platform, was taking off. While I preferred building custom solutions, many clients insisted on WordPress, lured by the idea of eliminating developers. If I couldn’t mine the gold, I’d at least supply the picks and shovels—or at minimum, understand the landscape.
So, I installed WordPress on my FreeBSD web servers and experimented by converting my old blog pages. I built a custom theme and migrated my content.
At the time, XHTML was giving way to HTML5, and CSS3 had just arrived with all its shiny new features. My theme showcased it all. I used it to demonstrate to clients, saying, “Look what we can do now!”
Then I got too busy to write blog posts.
The Cracks Begin
I kept WordPress updated, patching PHP and maintaining my increasingly outdated CSS-heavy theme. Eventually, my posts dwindled to iPhone 3GS photos with a headline and maybe a caption.
Meanwhile, running multiple servers for a handful of WordPress sites became a headache—plugins, caching, SEO, performance tweaks, security patches, spam, constantly polluting server logs with error messages—it was all a chore. Then add MySQL servers, backups, replication, and their enormous appetite for memory, and it was hardly worth it. Clients, too, were losing interest in blogging and the pressure to constantly generate new content, with many now leaning exclusively on social media.
I stuck with WordPress because my clients used it, and I needed to stay current. But I could sense a necessary change was coming. Time passed…
Exit WordPress
I had always been wary of WordPress, anticipating a long-term headache. Then in late 2024, another irritant surfaced: the drama between WordPress and WP Engine. That did it. Nobody needs to depend on any more dysfunctional tech bros. I was done hosting and managing WordPress sites. I wouldn’t recommend it to clients anymore.
It was time to return to our roots—the era before the internet was tainted by money when the web was new and fun. Even before that, we ran our own BBSs in the ’80s. We had built personal websites before Facebook and its inevitable toxicity. We cultivated our own digital spaces instead of planting seeds in the cesspool that Twitter/X became. It was time to go back and do it again, putting control in the hands of those who can own their words. No longer will they be monetized, muted, or erased by a social media platform.
Everyone warns: “don’t try to build your own WordPress!” But what is the alternative that doesn’t depend on yet another third party? Decades of seeing others rely on “platforms” and “frameworks” taught me a valuable lesson: if you have the skill and time, DIY always wins. I’ve always tried to do it myself before reaching for a crutch. In fact, my early computing history is mostly about building things nobody else has done before, by myself, and figuring things out with scant documentation (compared to the past couple of decades and easy access to help online).
Fun fact: A “typical” WordPress installation with a popular theme and a moderate number of standard plugins likely runs somewhere in the ballpark of 700,000 to 1,500,000 lines of code, maybe averaging around 1 million LOC. This new site? About 13,000 lines for everything: PHP, HTML, CSS, SQL, and JavaScript—including copious comments and hand-coded SVGs, too. (Worth noting, 2,700 of those lines are just for the third-party Parsedown class, the largest component of the entire site! PrismJS adds another 1,600 LOC.) The obvious advantage of less code is an extremely speedy experience, faster than WordPress ever was, even without any caching.
Time to Start Over
In mid-January 2025, I opened a blank Visual Studio Code window—no preexisting code, no frameworks, no bloated static site generators, no build steps, no dependencies. Just good old HTML, CSS, and JavaScript (when absolutely necessary). Well, more accurately, good new HTML and CSS. I love modern JavaScript and TypeScript, but for this project, I wanted to see how far I could go before reaching for scripting solutions. (Spoiler: You still have to write quite a bit for functionality, but at least modern CSS has removed a lot of the visual tricks you used to have to script yourself.)
When I built my previous blog, I assumed well-structured HTML would be easy to convert later if needed. I was wrong. Old HTML—especially pre-HTML5—was a mess. Embedded inline styles and unnecessary attributes were hacks to compensate for CSS’s limitations at the time. No more of that.
Markdown was the obvious choice for storing articles—simple, structured, and free from the overhead of a bloated CMS. A basic textarea for writing and editing? Perfect. But getting the content into Markdown would take a few intermediate steps.
Cleaning Up Content: Part I
I began by exporting the old blog database from WordPress into a stripped down and optimized SQLite schema. Ancient embedded YouTube objects, WordPress shortcodes, and other cruft in the content had to be removed or converted to modern HTML constructs. Several SQLite command line “search and replace” sessions took care of that. A write-and-use-once PHP script tackled the trickier conversions and the final reformatting to Markdown.
Even with the posts in better shape, they still needed hand-editing. So I marked everything unpublished so only I could see them in admin mode and revisit each one for a quality assurance pass before republishing them. But I needed a user interface to do that.
Editing Interface
With navigation, search, and other UI features dialed in, it was time to start tweaking old articles. That meant building an editing interface. And, of course, that meant implementing account security and a login system first.
I created the admin UI to be as minimal in code in every way as possible. I built an “Edit Post” dialog and wrote the PHP backend to handle updates. Now that I could actually change the data, I began to focus on storing the minimal Markdown I could get away with to render a post fully. That surfaced some issues.
Text Transformations
I wrote a simple PHP class to handle content conversion for authoring in Markdown and rendering to HTML when viewed. It worked well for 90% of Markdown’s features, but I wanted full support (bullet lists, tables, image links, etc).
As the edge cases grew more complex, I eventually deferred to Parsedown—a single PHP class file that did the last 10% I didn’t want to puzzle through myself. I also added the lightweight PrismJS to style code blocks with color syntax highlighting. These two are the only third-party code components in the project.
Next, I rolled my own typography transformer. Typographic entities—quotes, dashes, etc.—are stored as ASCII and converted back to HTML entities when rendered on the page. That includes the proper alternation of left and right curly quotes, and distinguishing pairs of single quoted words against apostrophes in contractions and possessives.
Because Parsedown skips anything inside of HTML tags, I also added a feature that allows for mixing Markdown contained in HTML. The need became obvious as I went through each post and noticed less-than-ideal layouts. For example, I can now author images in Markdown contained in a grid layout. Specially coded HTML tags, such as {{div class="grid x2 img"}}, are ignored by Parsedown so it can transform the Markdown image links within, and these tags are converted later to HTML.
As a uniquely handy feature for code blocks, I’ve added front-end support for an @source <url> directive on the first line of the block. When detected, the browser fetches the remote source—such as a raw file from a GitHub repo—and replaces the block’s content with the live code. This lets me mirror real, up-to-date source files in my posts automatically, with zero maintenance overhead. Best of all, the entire system is client-side and non-blocking: code blocks render instantly, and syntax highlighting is applied after the source loads, ensuring fast page loads and dynamic accuracy without sacrificing performance.
These details may seem small, but they matter and the added capability makes a big difference.
Enhanced Searching and Navigation
A database construct from WordPress I kept is the taxonomy of terms that can be assigned to posts. This is typically used for classifying posts in categories and tagging keywords in them. With those data relationships, I could then enhance the search feature to show posts by category simply by recognizing this pattern category:name-or-slug.
A search for category:tech would then show all the posts in the Tech category, while a search for tech would find all posts that have the word “tech” in them.
With that, I could construct URLs to support navigating directly into a category of posts. Now it is easy, for example, to refer to all posts in a category like Tech using a /category/tech URL.
Popovers and Dialogs
Previous approach:
Originally, I experimented with the Popover API to simplify modal interactions using native attributes like popover and popovertarget. However, the API’s limitations—especially the lack of tab focus containment and true modal behavior—meant I had to override much of its behavior. I converted all popover attributes to popover="manual" and built custom JavaScript to handle lifecycle, focus trapping, and modal behavior. While it worked, the reliance on native attributes ultimately proved more limiting than helpful.
Current approach:
I’ve since refactored the entire system. The only popover-like UI I now use is a toast notification element. For modal dialogs, I’ve implemented a clean, generalized solution using a Component class. This lets me define and inject components into pages as needed. Dialogs are now inserted just-in-time (JIT) when their opener is triggered, reducing DOM clutter and improving startup performance. Custom data- attributes now handle show/hide logic—no more reliance on popover attributes.
An added benefit of this JIT model is that dialogs containing forms are no longer baked into the static HTML of the page. This not only shrinks the initial payload, but also makes it far harder for bots and drive-by scrapers to discover and POST to form endpoints unless they fully execute JavaScript and simulate real user interaction. I had already addressed this from another angle (see the Basic Statistics section), but now incidents of automated backend probes should be virtually eliminated.
Each dialog manages its own lifecycle through a custom handler. I’ve also implemented focus containment to prevent tab key escapes, ensuring proper keyboard navigation inside modals. This new approach is simpler, more maintainable, and better encapsulated—without any of the limitations imposed by the Popover API.
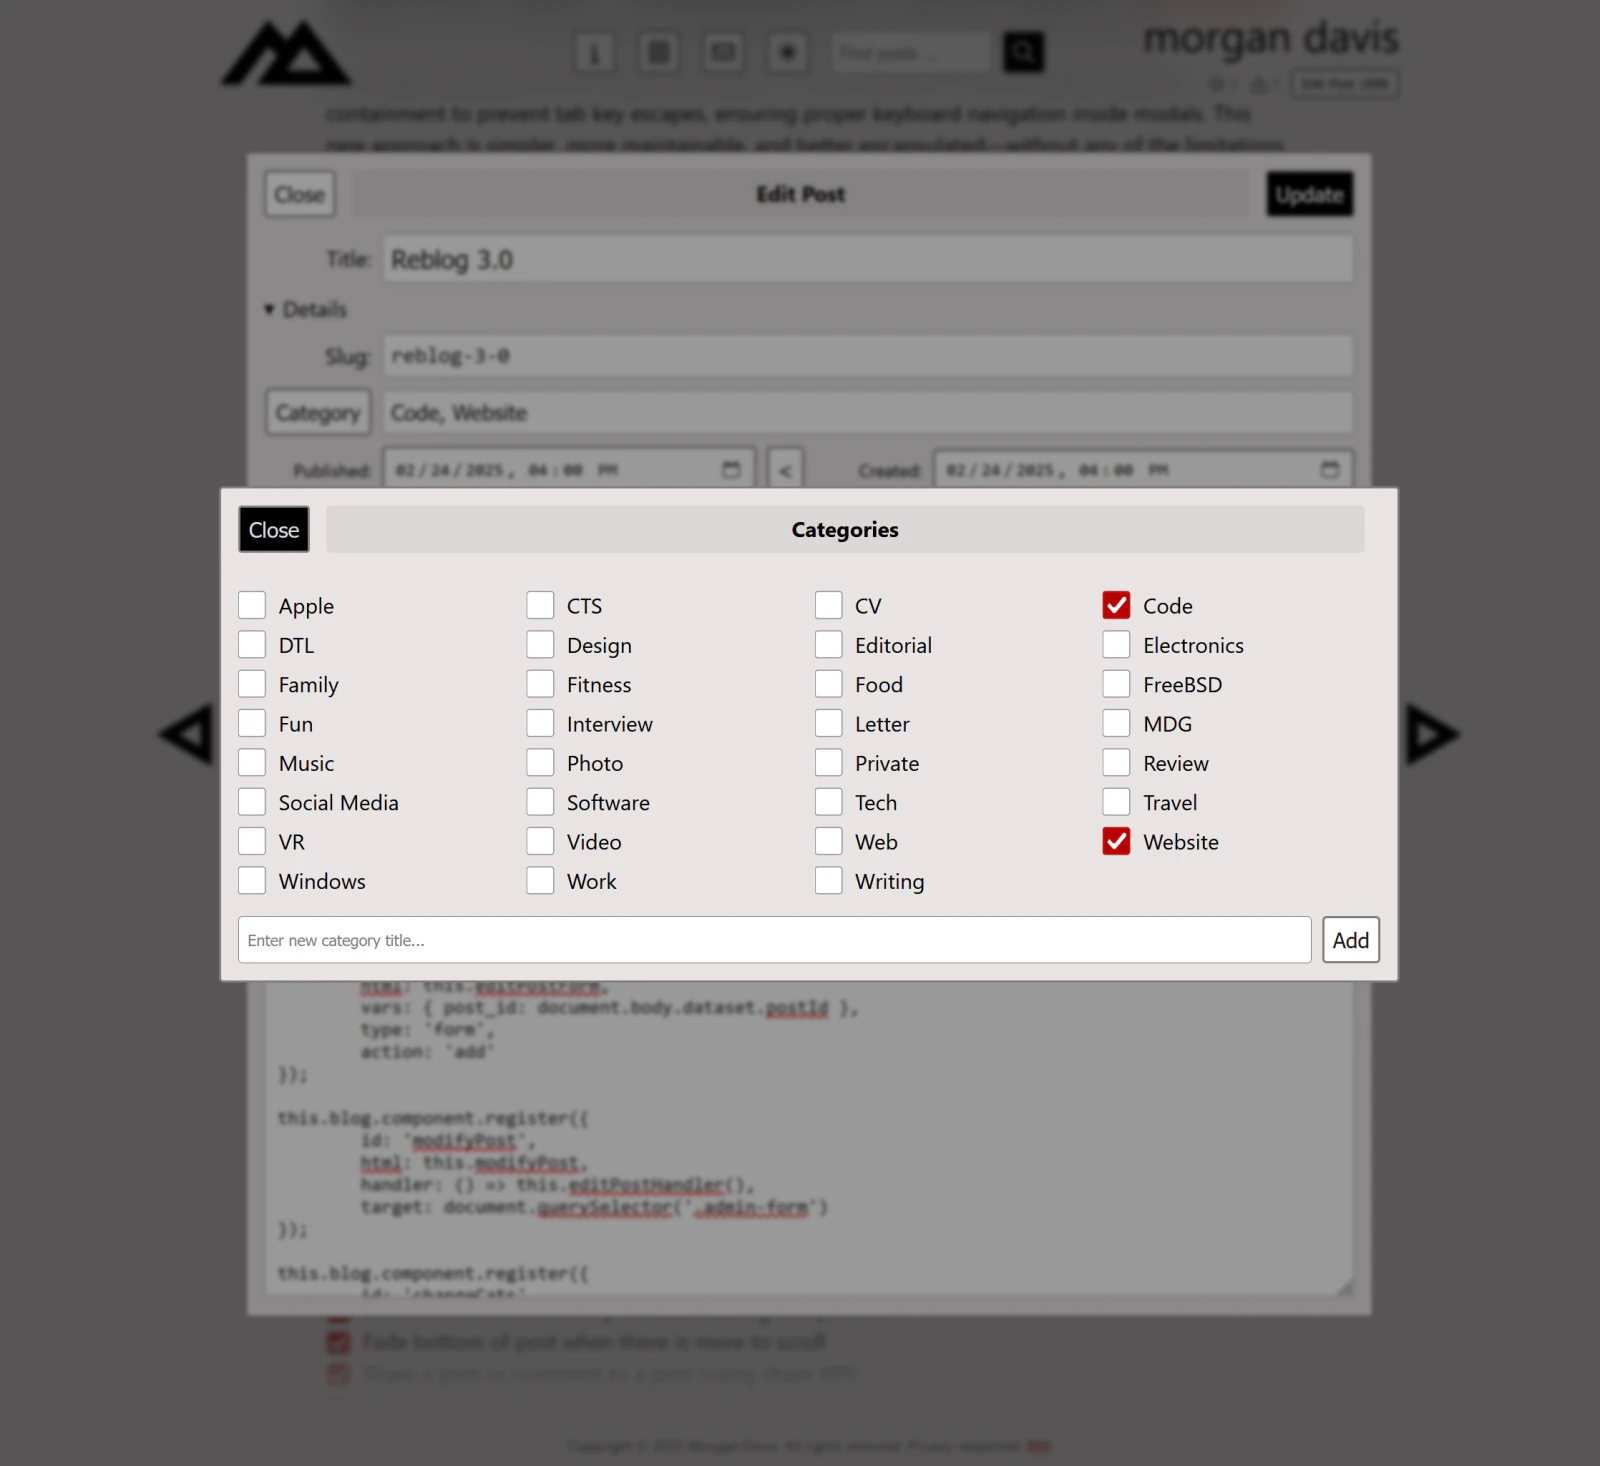
Component insertion example
This adds a form element to the DOM and then inserts two dialog elements into it. This is because the admin mode post editing UI is a dialog that contains a button that opens another dialog for managing the post’s category assignments.
this.blog.component.register({
    id: 'editPostForm',
    html: this.editPostForm,
    vars: { post_id: document.body.dataset.postId },
    type: 'form',
    action: 'add'
});

this.blog.component.register({
    id: 'modifyPost',
    html: this.modifyPost,
    handler: () => this.editPostHandler(),
    target: document.querySelector('.admin-form')
});

this.blog.component.register({
    id: 'changeCats',
    html: this.changeCats,
    handler: () => this.changePostCategoriesHandler(),
    target: document.querySelector('.admin-form')
});
The Finer Details
The site is starting the come together and is mostly usable. Now it is time to focus on features. Here is my task list:
- Contact form for sending email to me
- Copy the contents of a code sample box with a button
- Label a code box dynamically with its language
- Make a code box editable (maybe for mocking up screenshots)
- Pasting an image into a post
- Dragging and dropping an image into a post
- Smart image uploader preferring webp format if smaller
- Make text boxes arbitrarily resizable during composition
- Fade bottom of post when there is more to scroll
- Share a post or comment to a post (using share API)
- Reply to a post (hidden until approved)
- Reply to a reply
- Approve a reply made by a visitor
- Delete a reply and all its subordinate replies (admin)
- Like a post/reply
- Show like and reply counters on posts/replies
- Show filled star when liking a post/comment
- Allow opting-in to notifications for reply activity
- Send email to poster/comment author upon reply activity
- Allow deleting and editing a reply
- Use dynamic UUIDs for edit/delete access
- Implement “deleted by author” to preserve thread replies
- Implement max character limit on contact messages and replies
- Add post’s structured data and Open Graph tags to article HEAD
- Implement RSS feed
- Remember guest name/email to prefill form fields
- Support Gravatar images on comments
- Custom desktop and mobile layouts
- Full width hero images on mobile with content margins
- Show “Explore” section at bottom of pages
- YouTube viewer shortcode with still image instead of iframe
- Maintain hit/view/read counts on posts with same-session suppressor
- Add bot busting logic to prevent drive-by stat jacking
- Tri-state theme selector button (system preference, light, and dark mode)
- Add thumbnails on post index titles
- Lock slug from title changes while post is in published state
- Add colorized code syntax highlighting
- Generate dialog forms dynamically in JS (DRY in static HTML)
- Add dynamic insertion of external source into fenced code blocks
- Implement push notifications for post activity to augment email
- Add task view to admin mode (moderation duty, stats reports, etc.)
- Add recent post hero carousel to home page
- Create tool to find unreferenced media in ‘uploads’
- Add View By sorting feature on Posts index
- Add page selector control on index pagination
- Add device linking (sync uuid) via QR Code
- Add client ‘likes’ LS cleanup for remove posts/comments
Cleaning Up Content: Part II
I’ve been eagerly waiting for this part—this is the fun stuff! The hard work is done; now it’s time for the reward.
As I focused on usability features, I couldn’t ignore the fact that many of my old blog articles needed a refresh. Specifically, the outdated, pixelated images from the early 2000s—often blurry book covers—just don’t hold up on today’s high-resolution displays.
Luckily, I have access to all my published books and software package covers, a decent phone camera, and graphics software for any cleanup needed. Replacing the old images with fresh photos is an easy win, especially now that I can drag-and-drop or screenshot-and-paste for quick updates.
Along the way, I plan to correct a few spelling and grammar errors, tidy up the Markdown formatting, and add more images from the archives to enrich the content. Other than upscaling over 100 posts to ultra high definition, I want to keep the posts as true to the original as possible, plus add some bonus materials, updates, and commentary.
Optimized Images
I wanted the ability to both drag-and-drop and paste images into the textarea while composing replies. I built the front-end to handle media uploads, but the real magic happens on the backend.
The server stores the original image, then converts it to an optimized WebP format—resizing it if it exceeds a set dimension and reducing file size for the web. This means I can upload photos straight from my camera without needing Photoshop or similar tools. If the WebP version ends up larger than the original, the system automatically keeps the original instead.
Next, the backend provides the image URL along with its dimensions. A Markdown image link is then dynamically inserted into the textarea. This link includes the image URL, wrapped in an anchor tag for direct viewing in a new tab.
To optimize rendering, the image dimensions are appended as {width="xxx" height="yyy"}. This custom attribute syntax is later processed to inject width and height attributes directly into the generated <img> tag. This step is crucial because standard Markdown image syntax lacks attribute support. Without explicit dimensions, images lack defined shape, leading to Cumulative Layout Shift (CLS) and degraded Lighthouse performance scores.
One bonus here: That <img ...>{ ... } pattern post-processing allows me to add any other attributes I want to the image, like IDs and classes!
In fact, I used that to add loading="eager" or loading="lazy" depending on the existence of other images already in the post’s text. This significantly improves initial page load times as the “lazy” images only load when they are about to be scrolled into view.
While developing this feature, I discovered that
cwebpwould upscale images when using the-resizeoption—even if the source image was smaller than the target size. Since upscaling degrades visual quality, I preferred to preserve the original dimensions. I work around this with my own constraint logic, but I filed a ticket with the WebM team requesting an option to prevent this behavior. They agreed, and it’s slated for the next release! Details here: Add option to cwebp to prevent upscaling with -resize
Post/Search Index Thumbnails
Thumbnail images are built by parsing markdown image links in post content. The parser also extracts class, width, and height attributes. The image’s file modification date is checked against a cached thumbnail. If the thumbnail is nonexistent or stale, a new thumbnail is generated as a WebP image and written to the cache file. That file’s URI and dimensions are then used to build out the post index entry. Tricky CSS rules try to position the images in the best way to present them, taking into account their orientation and size.
Tooling
Tools used in this project:
- Editor/IDE: Microsoft VS Code
- Web stack: The latest NGINX, PHP, and SQLite on FreeBSD
- Browsers: Edge, Safari on iOS, Firefox
- Graphics: SVGOMG, Inkscape, Affinity Photo 2, cwebp
- Build: Simple updated file watcher/installer
- Free tier AI agents: ChatGPT, GitHub Copilot, Google Gemini, Perplexity AI
When building this project, I approached it with a minimalist, no-framework mindset. At the same time, I was curious about how much AI could help, especially with GitHub’s Copilot integration in VS Code now being freely available. I didn’t expect AI to build the entire project for me—nor could it—but having access to some quick code suggestions for trickier or more tedious tasks seemed like a useful tool. And I have opinions about that in my Replace Me With AI? article.
Browser Update: I had been using The Browser Company’s Arc browser for at least a year. I really liked its notion of spaces and tabs. Even though it gets frequent updates, they never seem to fix the nagging bugs I bump into all the time. I’m also sensing that they are not actively supporting it. But my primary issue is extremely sluggish UI in devtools compared to Edge and Firefox. While Firefox seems to be the fastest all around, Edge’s new workspaces feature now has the advantages I enjoyed with Arc. For now, I’m back to Edge on my battle station PC (until Firefox can do this without extensions).
Basic Statistics
Google Analytics? Hell no. I really don’t care if anyone sees or reads anything here. But I learned from the past that if it isn’t difficult to engineer collecting stats, do it early because you can’t rewind time.
To track which posts are actually getting engagement, I started by incrementing a counter in the post’s database record every time it was requested. But with AI and search bots hammering the server, those numbers quickly became useless.
Now, when a post is requested, I check for a cookie value to see if the visitor has already visited the post. If not, the server sets a “hit” state in the cookie. On the client side, if the user stays on the page for more than 3 seconds, that hit is promoted to a “view,” and the server updates the view count. (Some posts are nothing more than a photo, and a 3 second viewing is not unreasonably short.) If the user scrolls to the bottom, the view is promoted to a “read,” and the server logs it as a full read.
This gives me a much better sense of which posts were actually seen and read through to the end. I’m accumulating the stats on the post’s record now, but I plan down to the road to have a script that harvests the numbers and moves them into a historic ledger table for trend analysis.
And yes, the site enforces secure, strict, site-only cookies for protecting your privacy while still giving the site needed client-server state information exchange. So no worries about shared cookies with third parties—not that I do or would ever want to engage with them.
Challenges with Stats
Cookie values act as a lightweight history to prevent repeated counts. I don’t store any user data on the server, which is intentional. Sure, someone could clear their cookies and revisit a post, but that technically is a new view or read, so I’m fine with that.
Bots don’t trigger these states unless they simulate a real browser and run a JavaScript engine, dwelling on the page, and interact with the server again. In practice, that doesn’t happen—so my stats are no longer skewed by drive-by scrapers or indexers.
Work In Progress
This site is a continual work in progress. As I update it, I’ll be documenting it here in this post.
What do you think of the result?
Comments and suggestions are always welcome.